
$11 for a single piece of crispy rice spicy tuna at Nobu seems hard to believe. This signature appetizer has become a viral sensation on TikTok that food lovers worldwide crave, though a small serving at the renowned restaurant chain costs around $30.
The restaurant’s version carries a premium price tag, but you can easily recreate this delicious dish at home. A perfect bite-sized appetizer combines crispy sushi rice base with creamy avocado and spicy tuna that looks stunning and tastes amazing. One pound of sushi-grade tuna yields approximately 20 pieces of this trendy dish in your kitchen.

What Makes Crispy Rice Sushi Special
Crispy rice sushi has become a social media sensation with 32.1 million TikTok posts. This mouthwatering dish brings together contrasting textures and flavors that create an amazing dining experience.
The viral food trend explained
Chef Nobuyuki Matsuhisa at Nobu restaurants first made crispy rice sushi popular, and now you’ll find creative versions in many cultures. Chef Katsuya Uechi came up with his own take at Sushi Katsuya in Brentwood back in the early 2000s. The story goes that Uechi created this dish for a customer who didn’t like traditional sushi.
The dish’s magic comes from its mix of textures – golden, buttery toasted rice gives you that perfect crunch, paired with silky fresh fish and smooth avocado. This shows how classic sushi elements can turn into something new that still feels familiar.
Best-selling cookbook author Carleigh Bodrug says the crispy rice adds “an almost bacon bit effect,” which works great with smoky soy-based sauce. This clever prep method helps you use up leftover rice without losing any flavor.
Restaurant vs homemade versions
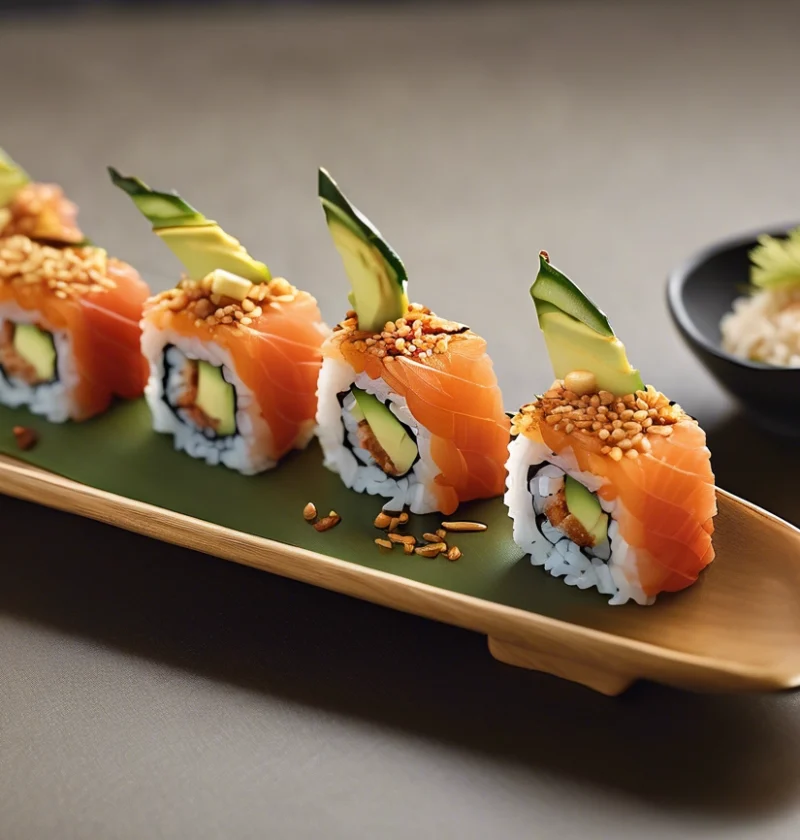
Restaurants each have their own special way of serving this dish. Nobu makes individual rice cubes with finely minced spicy tuna paste. Guests use toothpicks to dip crispy rice into the tuna mixture. Katsuya’s version features rectangular rice pieces pan-seared in butter. These pieces keep some white color and come topped with spicy tuna and serrano chile.
Making this dish at home has several perks over restaurant versions:
- Save money: A restaurant charges $30 for a small portion, but at home you can make about 20 pieces from one pound of sushi-grade tuna
- Make it your way: You pick the ingredients and adjust spice levels, toppings, and portions
- Enjoy it fresh: Eat right away for the best texture and taste
Home cooks usually make flatter rice cakes instead of cubes since they’re easier to pan-fry than deep-fry. This change makes cooking simpler but keeps that signature crunch everyone loves.
Crispy rice sushi works with many toppings beyond spicy tuna. You can try:
- Veggie combos with avocado and cucumber
- Salmon or imitation crab options
- Fusion takes that blend different cultural flavors
Storage matters – spicy tuna mixture stays good in the fridge for up to two days. The crispy rice base tastes best fresh to keep its crunch.
Chefs say great ingredients make all the difference. Short-grain sushi rice gives you that perfect sweet and sticky balance needed for texture. The rice should be plump enough to hold shape while frying yet get crispy outside and stay tender inside.
Essential Ingredients for Perfect Results
The difference between average and restaurant-quality crispy rice sushi comes down to picking the right ingredients. Let’s look at everything you need to create perfect results.
Best rice varieties to use
Short-grain Japanese rice is your best bet for crispy rice sushi. It releases more starch, which helps the grains stick together better. Premium brands like Nishiki and Botan are accessible to more people in most supermarkets.
Sweet rice (sticky rice) works too, but expect a denser, chewier texture. Stay away from long-grain varieties like basmati or jasmine rice – their low starch content won’t let the grains stick together properly.
Fresh toppings and garnishes
Crispy rice sushi shines because it’s so versatile. The classic spicy tuna topping is great, but many more fresh ingredients can lift your creation:
- Proteins: Sashimi-grade fish (tuna or salmon), imitation crab, or tofu for vegetarian options
- Vegetables: Shredded carrots, cucumber, green onions, and thinly-sliced jalapeños
- Creamy elements: Fresh avocado adds richness and balances textures
- Garnishes: Black or white toasted sesame seeds, fresh herbs like basil, shiso, mint, or cilantro
Sauces and seasonings
Getting the perfect flavor means paying attention to seasoning. The rice needs its own seasoning mix of:
- Rice vinegar
- Granulated sugar
- Salt
Japanese Kewpie mayonnaise creates the base for that signature spicy sauce. It has a smoother flavor and richer mouthfeel than regular mayonnaise because it’s made with just egg yolks. Regular mayonnaise with a touch of mustard works fine if you can’t find Kewpie.
Your other must-have seasonings:
- Sriracha or sambal oelek for heat
- Soy sauce (sushi/sashimi grade gives milder flavor)
- Fresh lime or yuzu juice for brightness
- Toasted sesame oil adds nutty depth
Here are some tasty sauce options to try:
- Bang Bang sauce – mix mayonnaise, rice vinegar, hot sauce, garlic, coconut aminos, and ketchup
- Teriyaki sauce
- Chili crunch
- Spicy mayo
Raw fish needs to be sashimi or sushi-grade that’s handled with extra care. High-quality canned tuna makes a great and convenient alternative.
Note that good seasoning goes beyond just the toppings. The rice tastes better with balanced flavors. A bit of mirin (Japanese sweet rice wine) or sesame oil in your rice seasoning mix adds extra depth.
Without doubt, proper storage will give you the best results. You can keep the spicy tuna mix in the fridge for up to two days. The crispy rice base needs to be fresh to stay crunchy.
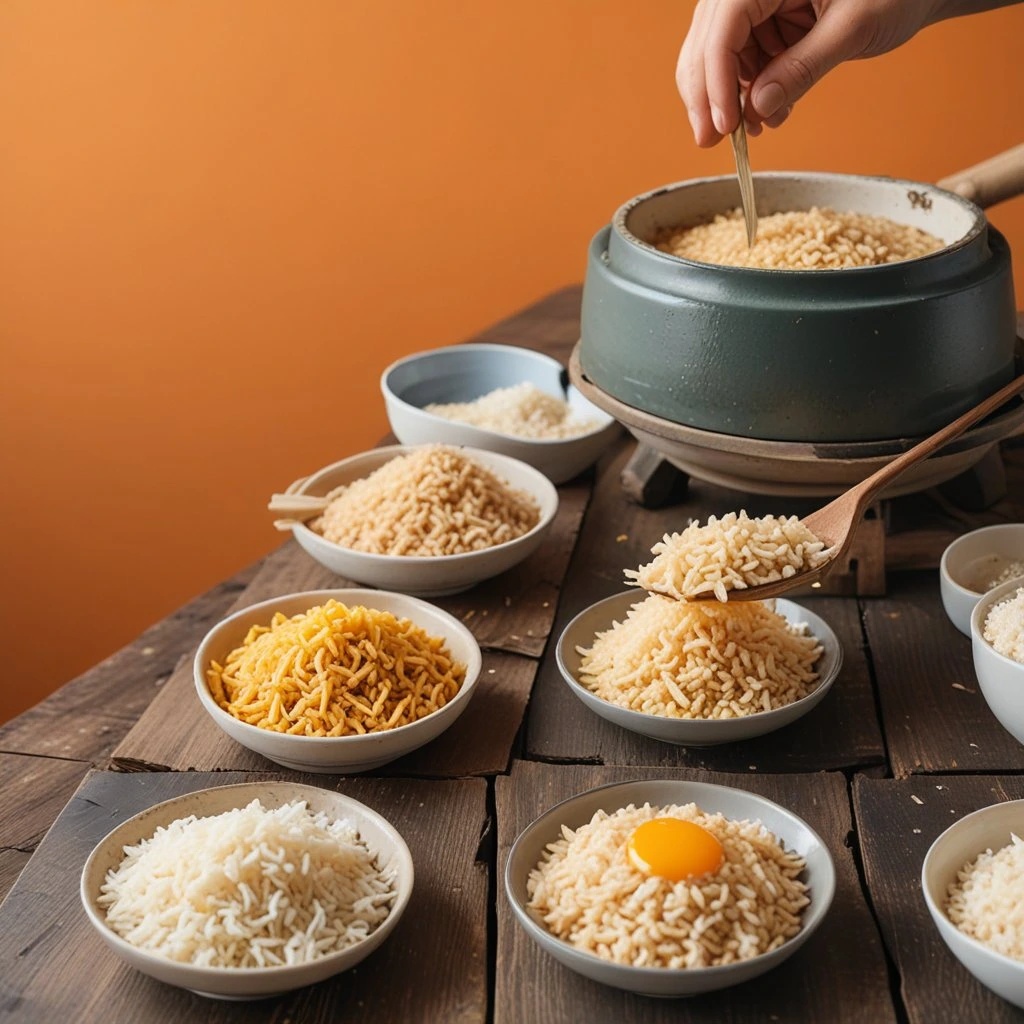
Step-by-Step Rice Preparation
The perfect crispy rice sushi starts with rice preparation. Your rice needs the right balance of stickiness and texture, which comes from following specific techniques.
Washing and cooking the rice
Clean rice washing gives you the best results and stops the rice from becoming mushy. Put the rice in a fine-mesh strainer or bowl and rinse it under cold water until the water runs clear. Use your hands to move the grains gently without breaking them – broken grains will ruin the texture.
The right measurements will give you the best results:
- Use a 2:3 ratio of rice to water
- Add a pinch of salt to improve flavor
- Think about adding kombu (dried kelp) for authentic umami depth
Mix rice and water in a pot over medium-high heat. Lower the heat to low and cover once it reaches a gentle boil. Let it cook for about 20 minutes, then take it off the heat but keep the lid on for 10 more minutes. This rest time lets moisture spread evenly through the rice.
Seasoning mixture ratios
Great sushi rice needs the right seasoning. While your rice cooks, prepare this mixture:
Basic Seasoning Formula:
- Rice vinegar
- Granulated sugar
- Sesame oil (optional to improve flavor)
Mix and heat these ingredients until the sugar melts completely. This helps the seasoning spread evenly through the rice. Pour the warm mixture over your fresh rice and fold it in gently with a rice paddle or rubber spatula.
The rice should look slightly wet right after you add the seasoning. The grains will soak up all the flavoring as they cool. This creates the perfect texture that will give you that signature crunch after frying.
Here are some vital tips:
- Temperature Control: Season the rice while it’s hot for better absorption
- Mixing Technique: Cut through the rice instead of stirring to keep it from getting mushy
- Cooling Method: Let the rice cool naturally to room temperature before shaping
Your seasoned rice should stick together firmly but separate easily when eaten. This balance is significant to create the perfect crispy rice base that you’ll shape and fry later.
Note that well-prepared rice does more than just support the dish – it adds to your sushi’s overall flavor profile. Each step matters, from washing to seasoning, and will affect your final dish.
Shaping and Frying Techniques
Making perfectly shaped and fried rice blocks needs precision and careful attention. You’ll need to nail the rice preparation first. The next steps will determine if your crispy rice sushi gets that golden crunch everyone loves.
Molding the rice blocks
The right molding techniques are the foundations of success. Take an 8×8-inch baking dish and line it with plastic wrap. Leave enough overhang so you can remove it easily. The seasoned rice should be pressed into a flat, even layer about 3/4-inch thick. This height will give you the perfect two-bite crispy rice cake.
These significant molding steps will help you succeed:
- Press firmly using a rice paddle or spoon, with extra focus on corners and edges
- Shape the block evenly so it cooks uniformly
- Cover with parchment paper and compress again
- Place something flat on top and weigh it down with 4-5 cans for better compression
Let it chill overnight or at least 6 hours until it’s completely firm. You can speed up this process by freezing it for 30 minutes. This chilling step is vital because it helps the rice stick together. The result is a solid block that’s much easier to cut and fry.
Pan-frying tips
The chilled rice block should come out easily using the plastic wrap overhang. A wet knife blade will give you cleaner cuts. You can cut the block into rectangles or squares – whatever you prefer.
Here’s how to get perfect pan-fried results:
- Heat oil in a skillet over medium-high heat until it shimmers
- Add just enough oil to coat the bottom thinly
- Keep 2 inches between pieces to avoid overcrowding
- Let each side cook 4-5 minutes until golden brown
Shallow frying actually works better than deep frying. This method lets you control the cooking process better and stops the rice from getting too crispy or dry.
Getting the perfect crunch
Temperature control and timing are the keys to restaurant-quality crunch. Your pan should feel quite warm, but not too hot – that could lead to uneven cooking.
These expert techniques will give you the best crispiness:
- Drop a single grain of rice to test the oil – it should sizzle right away
- Keep the heat at medium throughout
- Add more oil when needed during frying
- Listen for a gentle sizzle as it cooks
Put the fried rice blocks on a wire rack instead of paper towels. This step is vital because it lets air circulate underneath. Your rice stays crunchy and won’t get soggy at the bottom.
Air frying is another option. Set it to 380°F and cook for 16 minutes, flipping halfway. Traditional pan-frying usually gives better texture and color though.
The perfect fried rice should have a golden exterior with a slightly chewy inside. This mix of textures creates that amazing mouthfeel that makes crispy rice sushi so special.
Timing makes all the difference – rice keeps cooking even after you take it off the heat. Go for a light golden color rather than deep brown. The pieces will get crispier as they cool. This careful timing balances the perfect crunch with tenderness.
Popular Topping Combinations
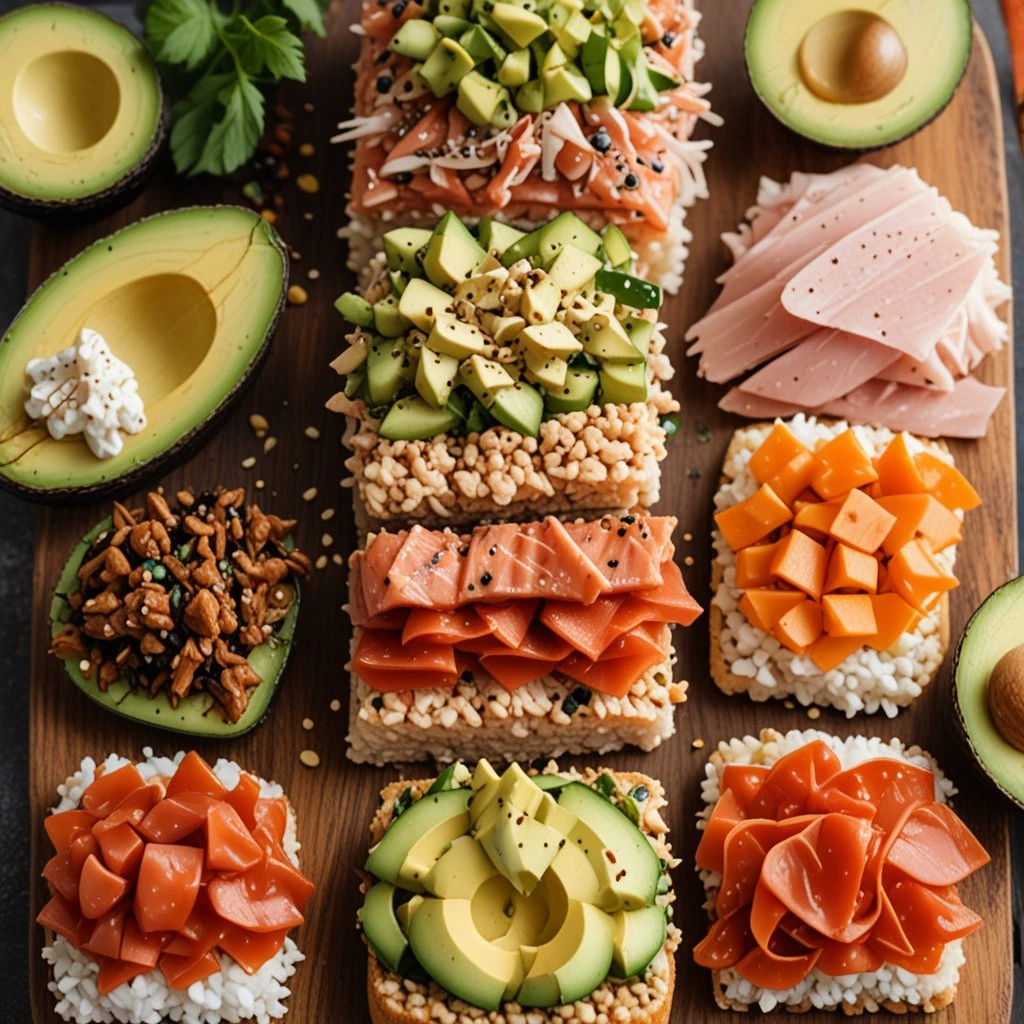
Spicy tuna and creative vegetarian alternatives can revolutionize simple crispy rice into an amazing culinary experience. Let’s discover some delicious combinations that will raise your homemade crispy rice sushi game.
Classic spicy tuna
The iconic spicy tuna topping needs high-quality sashimi or sushi-grade tuna, finely diced into small pieces. You can partially freeze the tuna first. This makes it firmer and easier to dice.
The perfect spicy tuna mixture combines:
- 8 ounces finely diced sushi-grade tuna
- 2 tablespoons Japanese Kewpie mayonnaise
- 1 tablespoon sriracha (adjust based on heat preference)
- 2 teaspoons soy sauce
- 1 teaspoon sesame oil
- 1 teaspoon rice vinegar
- 2 tablespoons thinly sliced green onions
Mix these ingredients gently but well. Kewpie mayonnaise creates a smoother, richer mouthfeel than regular mayonnaise because it contains only egg yolks.
Place thin avocado slices on the crispy rice base. Make sure they aren’t too thick. Add a generous portion of spicy tuna mixture, about 1-2 tablespoons per piece.
Each piece needs these finishing touches:
- Black or white toasted sesame seeds
- Thinly sliced jalapeño or serrano pepper
- Minced chives or scallions
- Optional extra drizzle of spicy mayo
High-quality canned tuna works great as an alternative to raw tuna. Just mash it finely with a fork until it becomes paste-like. This quick version still packs excellent flavor.
Vegetarian options
Plant-based options are just as exciting. Many vegetarian toppings create amazing flavor and texture combinations.
A fantastic vegetarian preparation includes:
- 1/2 cup diced tofu
- 2 tablespoons teriyaki sauce
- 1 teaspoon sesame oil
- 1 teaspoon black sesame seeds
- 1 teaspoon lemon pepper
- 1/2 avocado
- Diced green onions
Cook the tofu mixture on medium heat for 6-8 minutes until crispy. The sauce will thicken and coat each piece perfectly.
To name just one example, see these creative vegetarian alternatives:
- Mushrooms sautéed with umami seasonings
- Cucumber and avocado combinations
- Tempeh prepared with spicy sauce
- Pickled vegetables for added tang
A vegan spicy mayo blends:
- Regular vegan mayonnaise
- Sriracha sauce
- A drop of sesame oil
The options go way beyond these suggestions. You can try:
- Carrots julienned for crunch
- Thinly sliced bell peppers
- Fresh herbs like basil or cilantro
- Pickled radish or daikon
Texture is a vital part of vegetarian toppings. Include elements that provide:
- Creaminess (avocado, vegan mayo)
- Crunch (fresh vegetables)
- Chewiness (properly prepared tofu or tempeh)
- Umami (mushrooms, teriyaki sauce)
Prepare your toppings right before serving. Offering various options lets guests create their perfect crispy rice experience. Any leftover protein mixtures stay fresh in an airtight container in the refrigerator for up to two days.
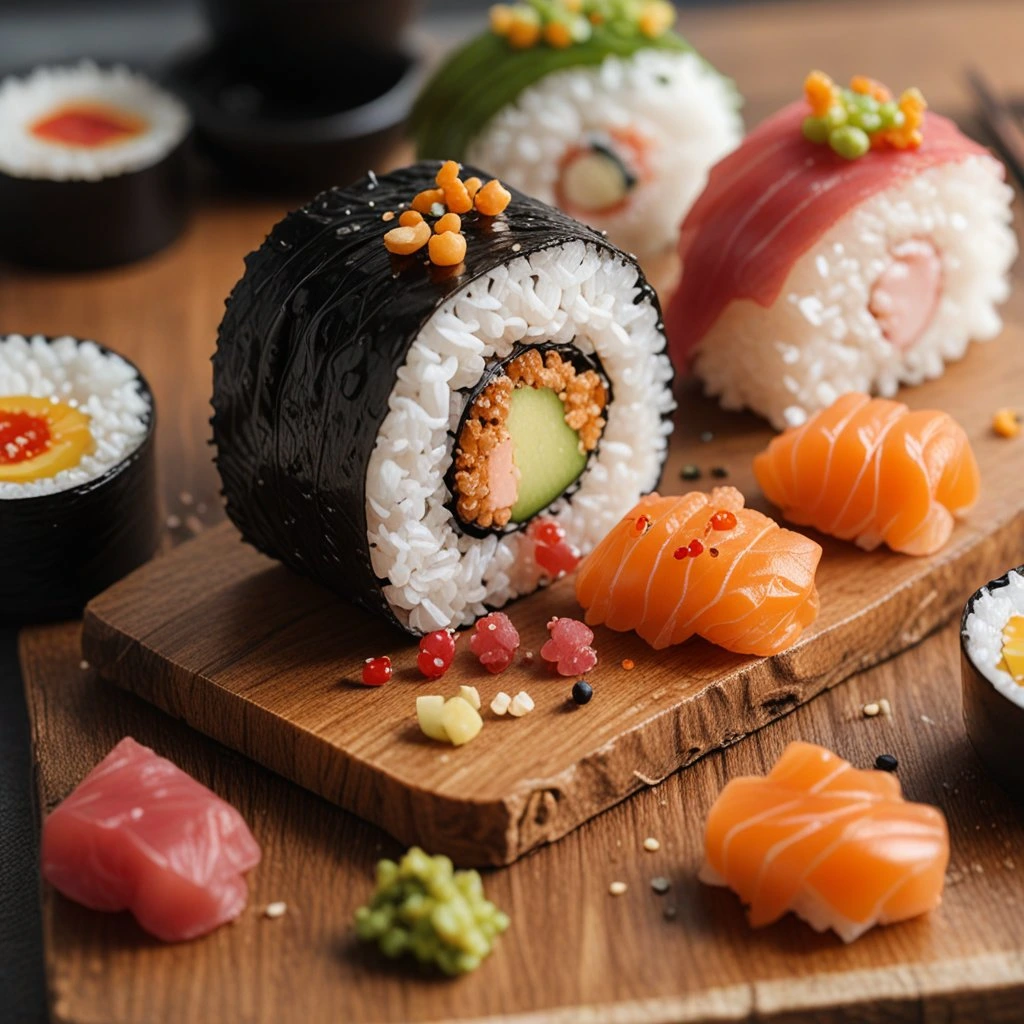
Plating and Presentation Tips
Your crispy rice sushi masterpiece needs one final touch – beautiful plating and presentation. The right arrangement will not only lift the dining experience but also show off your cooking skills. Let’s look at some expert techniques that can turn a simple appetizer into an Instagram-worthy creation.
Garnishing ideas
Garnishes do double duty – they look great and add complementary flavors to your crispy rice sushi. The right garnish should nail both looks and taste. Here are some popular options to improve your presentation:
- Avocado: Thin avocado slices bring creamy texture and bright green color. You can shape it into a “football” form using two teaspoons for a refined look that sticks well to the topping.
- Sesame seeds: A sprinkle of black or white toasted sesame seeds creates subtle crunch and visual contrast.
- Herbs and greens: Fresh chives or scallions add bright color and flavor. Microgreens or edible flowers can give an elegant touch.
- Jalapeño or serrano peppers: Thin pepper slices bring heat and visual appeal. One slice per piece creates the perfect balance.
- Roe or caviar: A small dollop adds luxury and mimics high-end restaurant style.
- Citrus zest: Fine lemon or lime zest brings color bursts and freshness.
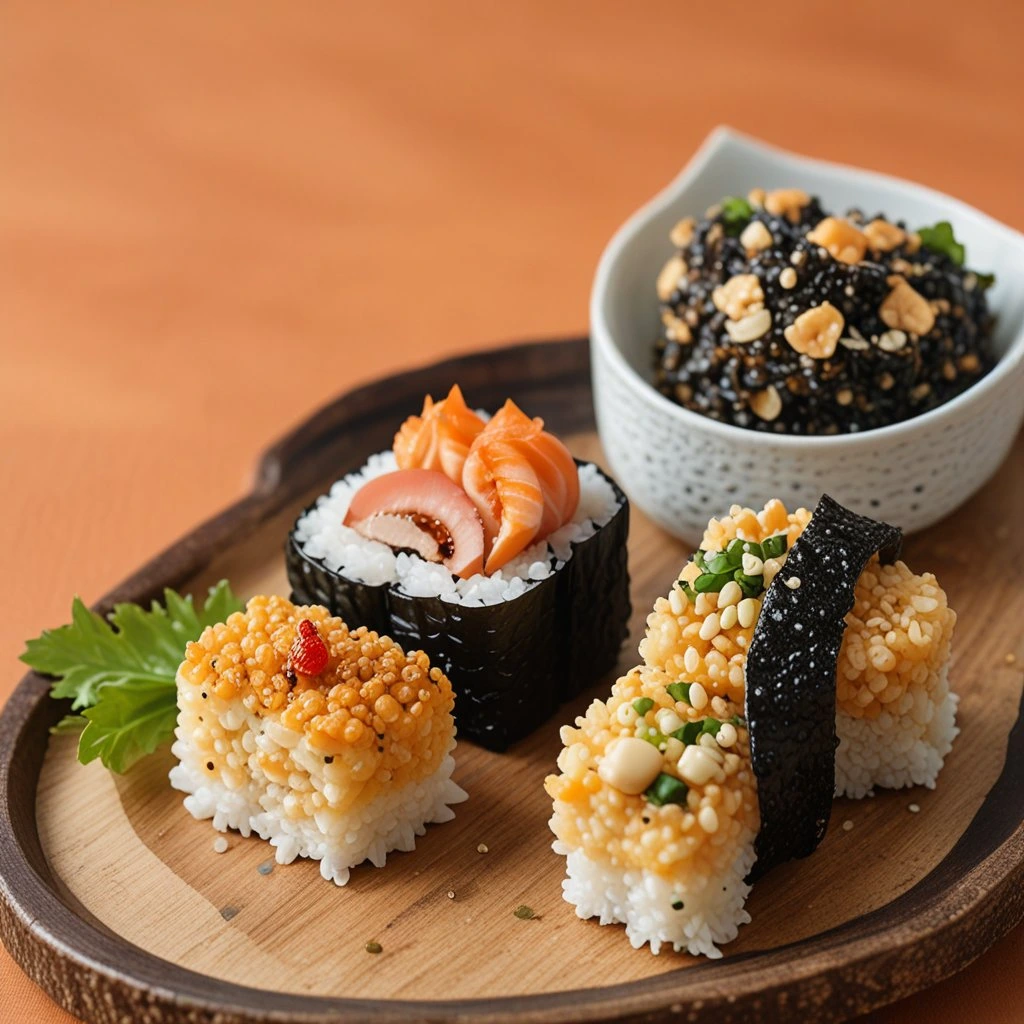
- Furikake: This Japanese blend with dried fish, sesame seeds, and seaweed adds flavor and visual flair.
- Pickled ginger: Though not a traditional topping, it adds a nice pink color and tangy kick.
The key to garnishing is balance. You don’t want to overpower the main components. Small tongs or tweezers help place delicate garnishes precisely.
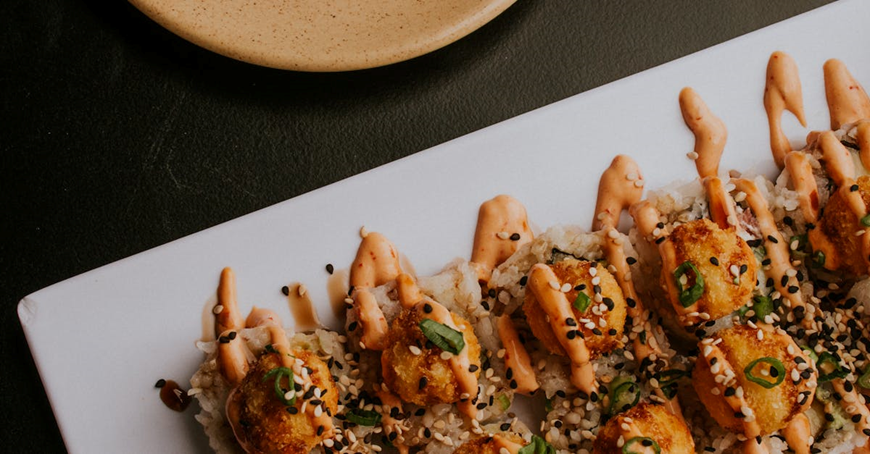
Sauce drizzling techniques
The right sauce can take your crispy rice sushi from good to amazing. The application technique matters just as much as the sauce itself. Here’s how to become skilled at sauce drizzling:
- Spicy mayo: This classic pairs perfectly with crispy rice sushi. Use a squeeze bottle to make thin lines across each piece or create zigzag patterns on the plate.
- Eel sauce: Sweet and savory depth comes from this sauce. A light drizzle or decorative plate pattern works well.
- Sriracha: Heat lovers can add a thin line along each piece. Small sauce dots on the plate work great for dipping.
- Sweet chili sauce: This brings perfect sweet-heat balance. Use it sparingly.
- Avocado sauce: A pastry bag with small tip helps pipe creamy avocado sauce efficiently, especially for big batches.
- Soy sauce: Serve this classic in a small side dish for dipping rather than drizzling.
Precision makes perfect sauce application. Practice on a test plate first. The sauce should enhance, not overwhelm, your sushi’s flavors.
Multiple sauces can create interesting designs. A spicy mayo base with thin Sriracha lines adds visual appeal and flavor complexity. Try different combinations to develop your signature style.
Plating techniques:
- Individual servings: Three or four pieces work well on small plates or wooden boards – perfect for appetizers.
- Family-style platter: Large groups need bigger presentations. Rows or circles make eye-catching displays.
- Lettuce cups: Small butter lettuce leaves make unique holders that add freshness and easy handling.
- Stacked presentation: Two or three carefully stacked pieces create drama. A decorative skewer keeps things stable.
- Deconstructed style: Modern presentations separate components on the plate. Diners can build their own bites from arranged bases, toppings, and sauces.
Additional presentation tips:
- Contrasting plates: The right plate makes colors pop. White often works best.
- Negative space: Empty plate areas make your sushi stand out.
- Odd numbers: Three or five pieces look better than even numbers for individual servings.
- Height variation: Different topping heights create visual interest.
- Edible decorations: Flowers, herb sprigs, or citrus slices add elegant touches.
- Temperature timing: Serve right after assembly for perfect warm rice and cool topping contrast.
- Lighting: Natural light shows off your creation’s true colors and textures best.
These plating and presentation techniques will help you create restaurant-quality sushi at home. Balance beauty with practicality – your creation should look amazing and be easy to eat. Practice will help you develop your signature style, making your crispy rice sushi the star of any meal or gathering.
Conclusion
Crispy rice sushi combines traditional techniques with modern creativity. Restaurants charge premium prices for this dish, yet making it at home gives you control over ingredients and saves money. The simple process involves preparing sushi rice, shaping it, frying until golden, and adding your favorite toppings.
Your attention to detail during each step determines the outcome. Well-seasoned short-grain rice provides the foundation, and precise shaping and frying techniques create that signature crunch. Fresh ingredients and thoughtful presentation turn these simple components into impressive results, whether you choose classic spicy tuna or experiment with vegetarian options.
Timing plays a crucial role – your crispy rice sushi tastes best when served right after assembly to maintain texture and temperature contrast. You should start with small batches to refine your technique before creating larger platters. With practice and patience, you’ll become skilled at making this viral sensation and create restaurant-quality results in your kitchen.